How to Paint the Interior of Your Home Like a Pro
7 Steps to Paint the Interior of Your Home Like a Pro

Least Expensive Home Improvement that Provides the Greatest Return
Painting the interior of your home is one of the least expensive improvements you can do that also provides the greatest visual impact, and if you are trying to sell your home, it provides the biggest return on investment. It is also one of the easier do-it-yourself jobs that if you are modestly handy, and have the time, you can save a lot of money by doing the work yourself.
As with everything that sounds too good to be true, there is a catch. If done improperly or poorly, it will also create the greatest negative impact and hinder your ability to sell the house fast and for the highest possible price.
So follow along, and we will make sure that you not only learn How to Paint the Interior of Your Home Like a Pro in 7 Easy Steps, but that the completed job is something you will be proud of!
Step 1 – Material and Tools
Before you begin, you will need to obtain the material and tools necessary to do the job. Here is a quick list of material you will need:
A high-quality latex caulk
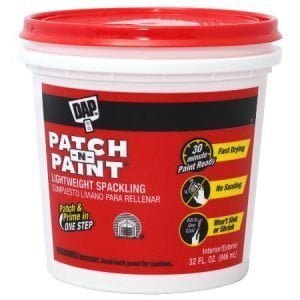
A small container of non-shrinking lightweight spackle (for filling holes)
Blue painters tape
A small bucket
A small sponge and paper towels
Plastic drop cloths
Canvas or similar type drop cloth
Sandpaper or a sanding block in medium and fine
Paint roller and tray
Roller pole (many times you can use a broom or mop handle)
Paintbrushes (at least a 2” and a 1 ½” angle of decent quality)
Small artist/hobby paintbrushes (for small or hard to reach areas)
Broom and dusting tools
Primer (if needed based on your specific house)
High-quality paint (prefer latex but use oil if the existing paint is oil-based)
You will also need various tools such as a screwdriver, small hammer, ladder, scissors, etc.
Pro Tip: Many home builders used oil-based paint on the doors, trim, and closet shelves that yellow/discolor over time. Before repainting, I would consider applying a coat of primer over the oil-based paint which will stop future discoloration. Then paint with latex paint which is less expensive than oil and environmentally friendly.
Step 2 – Remove and Loosen
If you want to paint the interior of your home like a pro in 7 easy steps, you must first spend the time preparing if you expect to have a great result. So before you even consider opening a can of paint, it is crucial that you properly prep the house for painting. So let’s get started. Here are the first steps in preparing the house to be painted:

Remove all paintings and decorations from the walls and ceilings
Remove all hooks, nails, and other things from the walls
Remove all light switch and outlet plate covers
Remove all fan covers
Remove or lower all downlight trims (commonly called high hats)
Loosen and lower light fixture ceiling trim (usually on chandeliers and ceiling fans)
Remove all blinds and window coverings (if they will be reinstalled you can leave the brackets)
Remove all door stops from baseboards, including the mounting plate
Remove furniture or place furniture in the middle of the room
Pro tip: If you are planning any future changes, such as ceiling fans, light fixtures, or new door hardware, you should consider doing them before painting. Many times, the new fixture has a smaller base/is not the same size as the old fixture and you will be fixing/repainting the area.
Once you have completed all of the above, you are ready for step 3.
Step 3 – Caulk, Fill, and Sand
This is where the real prep work starts, and what will have the greatest impact on the final results. So spend your time and get this right and the rest will be easy!
Caulk
You will use caulk to fill cracks, but not to fill holes. When using caulk, a bucket of warm water, paper towels, and a sponge will be your best friends.
When caulking, you spread/squeeze a bead of caulk along the crack. Then use your finger or a putty knife (fingers work best) to remove some of the excess caulk. Then use the damp sponge to smooth out and remove the remaining excess caulk, rinsing the sponge regularly. If you mess up, just use the sponge to remove the caulk and try again. Quick warning, you need to make sure you wipe the excess caulk and smooth it out before it starts to dry. This is more art than science, so the more you do, the better you will get at it.
Caulk around baseboards, windows, windows sills, door trim, decorative moldings, wall corners, and anywhere else there is a crack. One area to pay particular attention to is the corners around windows and where the moldings meet. Make sure you caulk these. Our eyes tend to look at corners more than the open walls, so uncaulked corners will be noticed. Make sure you immediately clean up any spills or drips
Fill
You will use the non-shrinking spackle to fill holes in the walls and ceilings. Again, you can use a putty knife but fingers work best.

Whenever you remove a nail or screw from a wall, it usually causes the drywall to protrude/stick out slightly around the edges of the hole. To fix this, you can use the handle of your putty knife as a hammer to knock in the part around the hole that is sticking out. What you want to create is a small indent that can be filled and made even with the rest of the wall.
Once you have made a small indent, take a small amount of the non-shrinking spackle and fill the hole, then use your finger or putty knife to remove the excess and smooth it out. Do this with holes that are about a ½ wide or less. You need to let this dry for at least 60 minutes, and perhaps longer for large holes, then lightly sand to remove any excess and ensure a smooth surface. Make sure you immediately clean up any spills or drips throughout the process.
Walls and ceilings with large holes or that have been badly damaged will need to be patched. There are many different types of wall materials/finishes, and many times, this is beyond the ability of the average homeowner to do correctly, so we would recommend you hire a professional to repair major damage.
Sand
You will need to lightly sand flat surfaces, like window sills, to ensure they are smooth and ready to be painted. If there are small holes or indents, you can fill them with a joint compound, let it dry, and then sand smooth. Do the same with and doors or trim that is rough.
Pro Tip: You can use joint compound to fill small gouges in painted trim. Just fill the gouge and when dry, shape the joint compound by sanding as needed. This may take several coats but the joint compound is easy to sand and shape.
Step 4 – Clean and Dust
After you have completed step 3, you will need to clean and dust baseboards, window sills, doors, shelves, and all dusty or dirty surfaces. Please pay particular attention to the top of baseboard moldings as they tend to collect a lot of dust.
If you do not take your time and do this correctly, you will see the dust and dirt through the paint, and then the only thing you can do to fix the problem is to sand off the paint and dirt – which is not easy or fun.
Step 5 – Cover Everything

By now, you probably have noticed that if you want to Paint the Interior of Your Home Like a Pro in 7 Easy Steps, a ton of work needs to be done that does not actually involve putting paint on walls. That is going to change shortly, but be patient. We promise the results will be worth the effort.
The next step is to cover and tape everything that you do not want to be painted. This includes floors, cabinets, window trim, curtain rod brackets, window blind brackets, toilets, showers, doorknobs, door hinges, lights, light switches, electrical outlets, AC vents, mirrors, countertops, and furniture – everything that you do not want to get paint on.
Pro Tip: This may seem to be a simple tip, but it is important to prevent unintended damage. Professional painters know from experience that no matter how careful you are, paint spills and drips. They will gladly put in a little extra effort to cover everything as it will prevent regrets and problems later. Do not skip this step.
Step 6 – Painting
The time has come to put paint on walls, or in this case, ceilings first.
When painting a room, you should always start by painting the ceilings first, that way if some paint drips on the walls, it does not matter. Just wipe it so it does not leave a drip mark and move on. Then you paint the walls and then the doors and trim (if spraying, paint trim and doors then walls).

When using a roller, roll slowly to prevent excess splatter and do small sections at a time, usually about 2 feet by 4 feet for each dip of the roller. You want to roll the paint on until the paint has been used/roller runs dry, then lightly back roll (reroll the area) to remove any roll marks or drips. To ensure good coverage, each successive time you dip the roller, you will need to slightly overlap the area previously rolled. Take a break from time to time, step back to look at anything you possibly missed or where the paint was not thick enough, and touch up as you go. When painting, slow and steady wins the race.
Before painting the doors and trim, you will need to place tape on the walls to prevent you from getting trim paint on the newly painted walls. Once all the edges of the trim and doors are tapped, proceed to paint the trim using a paintbrush or small trim roller. To prevent problems, put on light even coats and stop regularly to look for drips and fix as needed.
Pro Tip: Once you are sure that the trim and doors are properly coated, and when the paint is still slightly wet, carefully remove the tape from around the trim. This will make a bit of a mess (since the tape has wet paint) but if you wait for it to dry, when you remove the tape, it is common for it to peel some of the paint from the trim, creating a problem.
Step 7 – Finishing Touches
Here are the finishing touches that will make a good paint job a great one.
When you clean up, make sure you remove any paint that seeped behind the tape.
Touch up the hard-to-reach spots with the artist brushes, like the small crevices between the door trim and the walls, or the corners above the baseboards.

Put all of the cover plates in a sink filled with soapy hot water and wash them. Replace any damaged plates before reinstalling and replace the old and damaged plate screws with new color matching screws (you can buy the new switch plate cover screws in packs of 25 to 50 for a few dollars). This way, the switches and receptacles look new, which greatly enhances the appearance of the finished job.
Replace all discolored, rusted, or damaged door stops with new ones. This makes a huge difference in the quality of the finished job and the cost is minimal.
Wash all the bathroom vent fan covers, outlet box faceplate, ice maker supply box faceplate, and the like. If they are badly discolored, replace them. The most common bathroom fan cover cost only $6, but the improvement in appearance is almost priceless.
If your air conditioning vents are damaged, discolored, or have paint on them from the last time, then clean or replace them. The average AC vent cover is $12 and a large AC filter vent cover is $30. We also recommend you caulk around the air conditioning vents to give it a clean look.
The above items only add a few hours of work and about $100 in additional cost, but the results are far superior and make your paint job look better than the pros.
Final Tips
When selling a home, you want it to appeal to the greatest number of people, so paint with neutral colors like beige, light gray, and soft whites. Finally, use quality paint – this is one area not to be cheap. This does not mean buying the most expensive paint but does mean doing a little research on the best paint and caulk for the money. The appearance of the finished paint job is dependent on how much prep work you do and the quality of paint.
Conclusions
Now that you know How to Paint the Interior of Your Home Like a Pro in 7 Easy Steps, it’s time to get to work. If you are painting so you can sell your house, follow the steps above. Before you know it, your home will be sold.
For those of you who have read this article and don’t have the time, money, or ability to paint your home, but want to sell your home quickly, we have a plan for you too.
There is a Faster and Easier Way
Sell Your Home As-Is!
If you are short on time, money, or just do not want to deal with the hassle of fixing up your home and just want it sold, there is a faster and easier way. You can sell your home fast to a home cash buyer, like OutFactors. Avoid the painting, cleaning, and open houses. Sell your Dallas Fort Worth home the quick, easy, and stress-free way. OutFactors is the home cash buyer that makes it easy to “Sell Home As-Is,” and we usually close in 10 days or less.
To sell house fast for the highest cash price, all you need to do is enter your address and answer few simple questions about your home. The entire process takes about 2 minutes and personal information is not required. No registration. No email address. No telephone number. Not even your name!
When OutFactors buys your home for cash, you do not need a real estate agent. That means no hefty fees and potentially more money in your pocket. You will find that selling to companies that buy houses for cash, like OutFactors, has many benefits. One of these benefits is being able to choose the closing date, or with our sell and stay leaseback program, you choose when you will move out. Getting a cash for house offer is always free and there is never any obligation, so you have nothing to lose. It really is that simple.
Sell Your Home for the Highest Cash Price!
If you have a house in Dallas Fort Worth area that you are interested in selling fast for the highest cash price, then we invite you to visit OutFactors.com/offer or call 800-420-7030 to speak with a live person. At OutFactors, you can sell house fast for some of the highest cash prices without the pressure. Take your time and decide when you are ready – we will be here when you need us!
OutFactors is a company that buys houses for cash located in the Dallas Fort Worth area that has been in business since 2001. We are proud to be managed by a Texas licensed real estate professional and are BBB accredited with an A+ rating. We are the company that buys houses you can trust and we put everything in writing using Texas standard contract forms. Want to sell but stay living in the home you love? Then ask about our Sell and Stay Program. The people at OutFactors are super easy to talk to and will answer all of your questions.
We hope this article was informative and helpful. If you have any questions or would like additional information, we invite you to contact us at OutFactors.com or watch some of our 2-minute explainer videos that provide information about our cash home buying programs.
OutFactors
539 West Commerce Street
Suite 1205
Dallas, Texas 75208
Contact@OutFactors.com
www.OutFactors.com
(800) 420-7030
How to Paint Your Home Like Pro | Home Cash Buyer | OutFactors – Dallas Fort Worth, Texas


